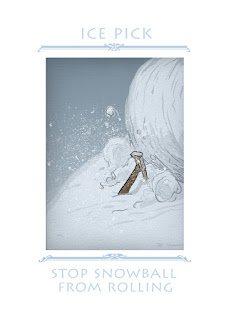
Without the cards Yeti Mountain would not be as exciting nor as enraging. Here is a list showing all of the cards that have been drawn for Yeti Mountain:
(There are 3 different versions of the "Avalanche" card. Once moves a player back 3 spaces, another 2 and another moves them back 1)
(Just like the "Avalanche" card, the "Map" card has 3 different variations. One moves a player ahead 4 spaces, one moves them ahead 5 and the other moves them ahead 6.
(This is the "Supplies" card. Players pick this card up when they pass by the lodge. They can trade it in for a full hand of cards. It can completely change the course of the game if played at the right time!)
If you have any questions on some of the specifics, please ask and I will try my best to answer them!
If you have any feedback on how I could have improved the designs, I would love to hear it!
Thanks,
Marlon :)
If you have any feedback on how I could have improved the designs, I would love to hear it!
Thanks,
Marlon :)
Art by: Rachael Greenfield (http://craftysalad.tumblr.com/)
Yeti Mountain Facebook Page: https://www.facebook.com/YetiMountainBoardGame/
Prefundia page(Sign up on the email list here!): http://prefundia.com/projects/view/yeti-mountain/8917/
Instagram : https://www.instagram.com/yeti_mountain_the_board_game/
Twitter: https://twitter.com/ElementaryCeo
Yeti Mountain Facebook Page: https://www.facebook.com/YetiMountainBoardGame/
Prefundia page(Sign up on the email list here!): http://prefundia.com/projects/view/yeti-mountain/8917/
Instagram : https://www.instagram.com/yeti_mountain_the_board_game/
Twitter: https://twitter.com/ElementaryCeo


